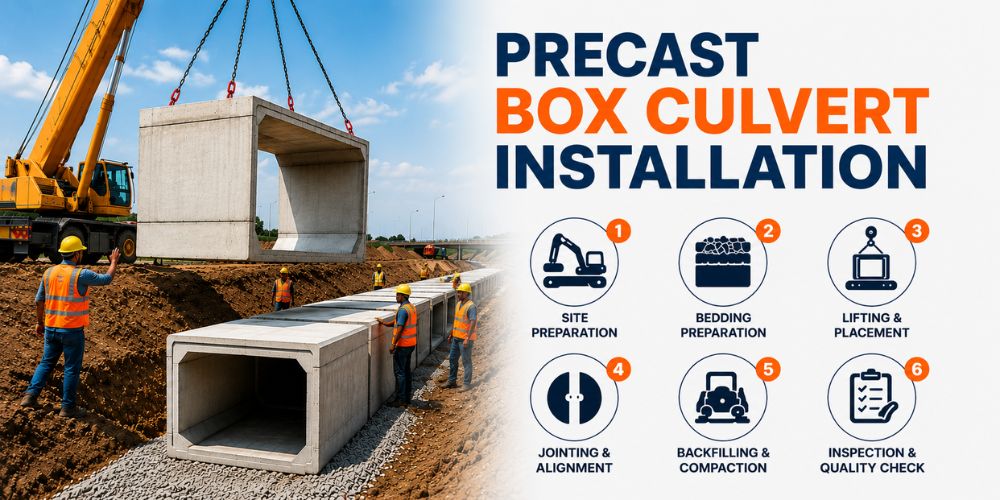
Precast Box Culvert Installation: A Step-by-Step Guide
Modern infrastructure projects demand speed, quality, and long-term performance. Whether it is a highway cross-drainage structure, railway underpass, utility corridor, stormwater channel, or industrial service tunnel, precast box culverts have become a preferred solution because they combine structural strength with faster project execution. Sneh Precast manufactures precast box culverts in multiple sizes and load classes, designed for road, railway, utility, and drainage applications. These units are produced in a controlled environment using reinforced concrete and can be supplied in single-cell or multi-cell configurations for varying site requirements.
However, the performance of a box culvert depends not only on manufacturing quality but also on proper installation. After years of working on precast infrastructure projects, one principle remains constant: a well-manufactured culvert installed incorrectly can fail, while a properly installed culvert delivers decades of service life.
This guide follows industry-recognised installation practices and focuses on the complete installation sequence from delivery to backfilling.
Understanding the Role of Precast Box Culverts
Precast box culverts are reinforced concrete structures designed to carry water, pedestrians, utilities, or vehicles beneath embankments, roads, railways, and industrial developments. Their modular nature allows rapid installation compared with cast-in-situ construction, significantly reducing site disruption and project timelines. Sneh Precast's box culverts are engineered for heavy-duty infrastructure applications and are designed to comply with relevant load and quality standards.
Common applications include:
- Stormwater drainage systems
- Road and railway crossings
- Utility tunnels
- Service corridors
- Pedestrian underpasses
- Industrial drainage infrastructure
- Township and smart-city developments
Step 1: Delivery Planning and Offloading
Installation begins long before the first culvert reaches the trench.
The contractor should coordinate delivery schedules, installation sequence, crane availability, and storage arrangements before units arrive on site. Installation delays often occur because delivery planning is treated as a logistics task rather than an engineering activity. The installation guide emphasises confirming delivery dates, providing safe vehicle access, ensuring adequate hard standing, and arranging lifting equipment with sufficient capacity.
Pre-Delivery Checklist :
- Confirm laying sequence
- Verify crane lifting capacity
- Prepare unloading area
- Ensure vehicle access roads are stable
- Review lifting method
- Inspect safety provisions
Every culvert unit should be visually inspected upon arrival for transportation damage before acceptance. Units should always be lifted rather than dragged across the ground.
Step 2: Trench Excavation and Formation Preparation
The trench formation is the foundation of the entire system.
Many installation issues originate from inadequate preparation of the trench base. Uneven support creates differential settlement, which can affect joint alignment and structural performance.
The installation guide recommends preparing a stable formation before bedding placement. Once the formation is ready, it should be protected from disturbance by unnecessary site traffic.
Key Considerations :
- Verify excavation dimensions
- Confirm design invert levels
- Remove loose material
- Eliminate soft spots
- Maintain uniform bearing capacity
- Protect prepared formation from deterioration
Step 3: Bedding Installation
Proper bedding provides uniform support beneath the box culvert.
According to the installation guide, a well-compacted granular bedding layer should be installed across the full trench width with a minimum thickness of approximately 200 mm. A fine blinding layer is then used to achieve final level accuracy.
Recommended Bedding Process :
- Compact the formation layer.
- Install granular bedding.
- Maintain minimum design thickness.
- Blind the surface with fine material.
- Verify level and alignment.
For certain projects, a lean concrete blinding layer may be used instead of granular bedding to protect the formation and accelerate installation activities. The guide notes a typical blinding thickness of approximately 75 mm where specified.
Step 4: Joint Preparation
Joint performance is critical for structural continuity and hydraulic efficiency.
Before placing the next unit, joint surfaces must be clean and free from debris. Where sealing strips are specified, they should be installed immediately before placement. The installation guide recommends cleaning, priming where required, and ensuring continuous placement of the jointing material.
Joint Inspection Checklist :
- Socket surface clean
- Spigot surface clean
- No concrete damage
- Jointing strip continuous
- Corners properly joined
- Manufacturer recommendations followed
Step 5: Placement of Box Culvert Units
Correct placement directly affects alignment, hydraulic performance, and load transfer.
Industry practice is to start installation from the downstream end with sockets facing upstream so that each new unit can be installed into the previously placed section. The installation guide specifically recommends inspecting the culvert before placement and carefully aligning the spigot and socket connections.
Placement Sequence :
- Lift the unit using approved lifting points.
- Position over prepared bedding.
- Lower carefully into place.
- Align with previous section.
- Verify level and line.
- Check joint engagement.
If level corrections are required, the guide recommends removing the unit and adjusting the bedding rather than using localized packing.
Step 6: Joint Closure and Alignment
After placement, joints must be properly compressed to achieve the intended seal.
The installation guide explains that joint closure is typically achieved by pulling the new unit against previously installed sections. When sealing strips are used, sufficient compression is necessary to activate the jointing system.
During Joint Closure:
- Verify anchor position
- Maintain alignment
- Prevent displacement
- Confirm design gap
- Inspect seal continuity
A properly formed joint improves both structural performance and hydraulic flow characteristics.
Step 7: Backfilling and Compaction
Backfilling is one of the most critical stages of installation.
Many box culvert failures occur because backfilling is rushed or performed unevenly. The installation guide recommends commencing backfill as soon as practical after installation while maintaining balanced fill levels on both sides of the structure.
Recommended Procedure :
- Place selected fill material
- Compact in layers not exceeding 200 mm
- Maintain equal fill heights on both sides
- Continue to culvert crown level
- Complete cover fill in controlled lifts
Heavy vibratory equipment should not be used directly adjacent to the structure, and heavy construction traffic should be restricted until adequate cover is achieved.
Step 8: Safe Lifting Practices
Safety is a non-negotiable aspect of precast installation.
The installation guide provides specific recommendations regarding lifting and turning operations. Units should only be lifted from approved lifting points using suitable lifting gear. Incorrect lifting from side faces or using unapproved lifting arrangements can damage the product and create significant safety risks.
Safe Lifting Principles :
- Use designated lifting points
- Use certified lifting equipment
- Protect exposed edges
- Keep personnel clear of suspended loads
- Follow approved lifting plans
- Never lift from unapproved positions
- Common Installation Mistakes to Avoid
From practical project experience, the most common installation errors include:
- Poor trench preparation
- Uneven bedding levels
- Damaged joint surfaces
- Inadequate joint compression
- Unbalanced backfilling
- Premature construction traffic loading
- Improper lifting procedures
- Lack of final inspection
Avoiding these mistakes significantly improves service life and reduces maintenance requirements.
Why Precast Box Culverts Continue to Gain Popularity
Compared with cast-in-situ construction, precast box culverts offer:
- Faster project execution
- Factory-controlled quality
- Reduced labour requirements
- Improved dimensional accuracy
- Consistent structural performance
- Reduced weather dependency
- Earlier commissioning of infrastructure assets
These advantages are a key reason why precast box culverts are widely adopted in highway, railway, industrial, and urban infrastructure projects.
Conclusion
A successful precast box culvert installation results from careful planning, proper trench preparation, accurate bedding, controlled placement, effective jointing, and disciplined backfilling. Each stage contributes directly to the long-term performance of the structure.
For infrastructure projects requiring reliable drainage systems, utility crossings, underpasses, and service corridors, Sneh Precast's engineered box culverts provide a durable and efficient solution. When combined with correct installation practices, these systems deliver the structural strength, hydraulic performance, and longevity expected from modern precast infrastructure.